Basics
– Purpose of the ability capacitor
A capacitor is a store of voltage or electrical power. That is why they are sometimes called power capacitors or just power caps. Moreover, they function a reliable method to perform the decoupling task to cut back the noise level of the ability supply. For that reason, they’re commonly utilized in audio equipment or accessories resembling an amplifier.
– Why use capacitors in amplifier circuits?
Within the amplifier circuit diagram, it is clear that the ability amplifier generally serves the role of energy storage, as in some other circuit. It’s superior to lead-acid batteries as a consequence of its low internal resistance, which allows the battery to charge and deliver energy at high speeds. In a automotive stereo system, which is taken into account to have power-hungry components, the demand for electricity will probably be significant, and if you happen to are a fan of heavy metal or hard rock music, instruments resembling bass and drums can increase the standard demand within the blink of a watch.
When should a capacitor in amplifier circuits get replaced?
As for the ability capacitor, it’s rare that there’s something mistaken when the capacitor is qualified. The electrolytic capacitors may decrease over time. In reality, it could take over a decade to develop such an answer, which is for much longer than most individuals probably own an amplifier. In the event you notice that your audio device is having trouble functioning normally (e.g. there may be a buzzing or humming noise coming from the amplifier), you might need to interchange the ability cover.
In keeping with some audiophiles, an influence capacitor is just not obligatory. They like three huge upgrades that include a booster and a cycle battery.
Methods to connect an amplifier to a capacitor?
Now let’s take a automotive audio system for example of how you can accurately connect an amplifier to a capacitor.
Materials and tools you’ll need
Easybom Easybom suggests using a 1 watt resistor to charge the capacitor. A lower wattage resistor could also be too hot to handle. It’s also possible to use a test bulb, which is the normal method.
Ensure you employ the identical size circuit by which the capacitor will probably be placed.
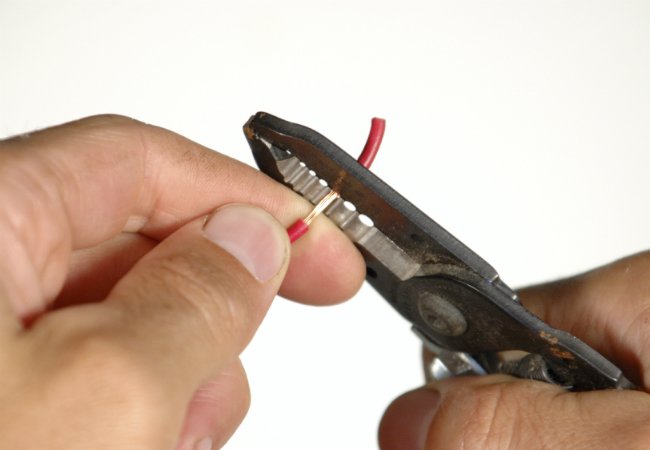
- Insulation stripping tool
- Self-adhesive eyelet connectors which can be heat shrinkable
- Heat shrink tip for ends
- Keys
- Memory saving
Step-by-step instructions
Step 1. The capacitor should be discharged to be used. Place your automotive in a dry and quiet place where you are usually not disturbed by other drivers. Connect the battery ground clamp.
Step 2: Disconnect the fuse and replace it with a resistor. Configure memory saving. Follow the device manufacturer’s instructions.
Step 3: Disconnect the battery cable from the negative end.
Step 4: Find which power circuit you’re on. That is where you’ll need to interchange or place the capacitor.
Step 5: Using a wire stripper, cut the positive power wire within the circuit. Cut off the insulation on each ends of the wire you simply cut.
Step 6: Place an eyelet on one end of the wire.
Step 7: Connect the ability cord to the positive terminal of the capacitor that powers it.
Step 8: Place the capacitor as much as possible within the amplifier to reduce noise. This can be a requirement within the manufacturer’s instructions.
Step 9: Complete the remaining of the wire in keeping with this diagram. Make sure to use a wrench to secure each end nut.
Step 10: Ground the cable after which connect the negative battery cable.
Step 11: Remove the memory saver.
Step 12: Activate the vehicle, the capacitor needs to be charged and also you will probably be able to drive.
summary
Make sure to remove the capacitor before performing some other procedures. In the event you are unsure concerning the problem, seek help from an experienced mechanic.
In the event you find an error within the text, please send a message to the writer by choosing the error and pressing Ctrl-Enter.